# OceanEngine Integration Solution
This article will introduce how to integrate OceanEngine data into the TE platform. Currently, the TE platform supports the integration of OceanEngine's multi-in-one data report interface (opens new window).
TIP
Please note that data generated from integrating with third-party platforms will be included in the consumed data volume of the cluster.
# Summary
| Interface | Integration Type | Data Granularity | Attribution | Cost | Revenue | Impression | Click | Conversion |
|---|---|---|---|---|---|---|---|---|
| Multi-in-one data report | API | Aggregate metrics | ✅ | ✅ | ✅ | ✅ |
The multi-in-one data report (opens new window) supports various levels of ad data, such as ad granularity, material, and keyword level, and its analysis dimensions and indicators are very rich.
# Integration process
- Log in to the OceanEngine Open Platform (opens new window), create a developer account and application, and obtain the APP_ID and Secret for the application.
- On the OceanEngine configuration page in the TE backend, create an integration plan, fill in the APP_ID, Secret, and login user ID of the application, obtain the callback URL, and save the configuration.
- Go back to the OceanEngine Open Platform, modify the callback URL for the previously created application, and obtain the authorization link.
- Open the authorization link in a browser, log in to your OceanEngine account that owns the advertising account you need to pull data from, and complete the authorization.
- Go back to the OceanEngine configuration page in the TE backend, set up scheduled data pulls, and perform a one-time pull to synchronize the data.
- Check if the TE system has successfully received the data and complete the report building.
# Create an OceanEngine application
# 1.1 Create a developer account and application
Before accessing OceanEngine data, you need to apply for an OceanEngine developer account and create an application.
First, log in to or register a Ocean account. Click on this link (opens new window) to go to the login and registration page. If you already have an OceanEngine account, select "log in" in the lower left corner and log in to the corresponding account. If you do not have an account, register for an OceanEngine account using your email or phone number.
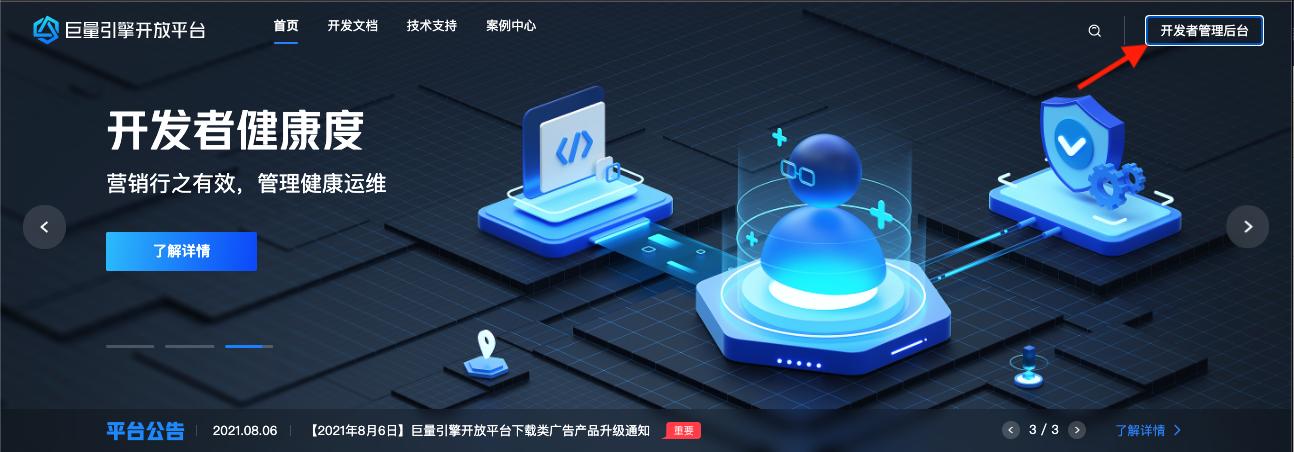
After completing the login, you will be redirected to the OceanEngine Open Platform (opens new window). Click on the "Developer Management Backstage" button in the upper right corner of the page to enter the developer backstage.
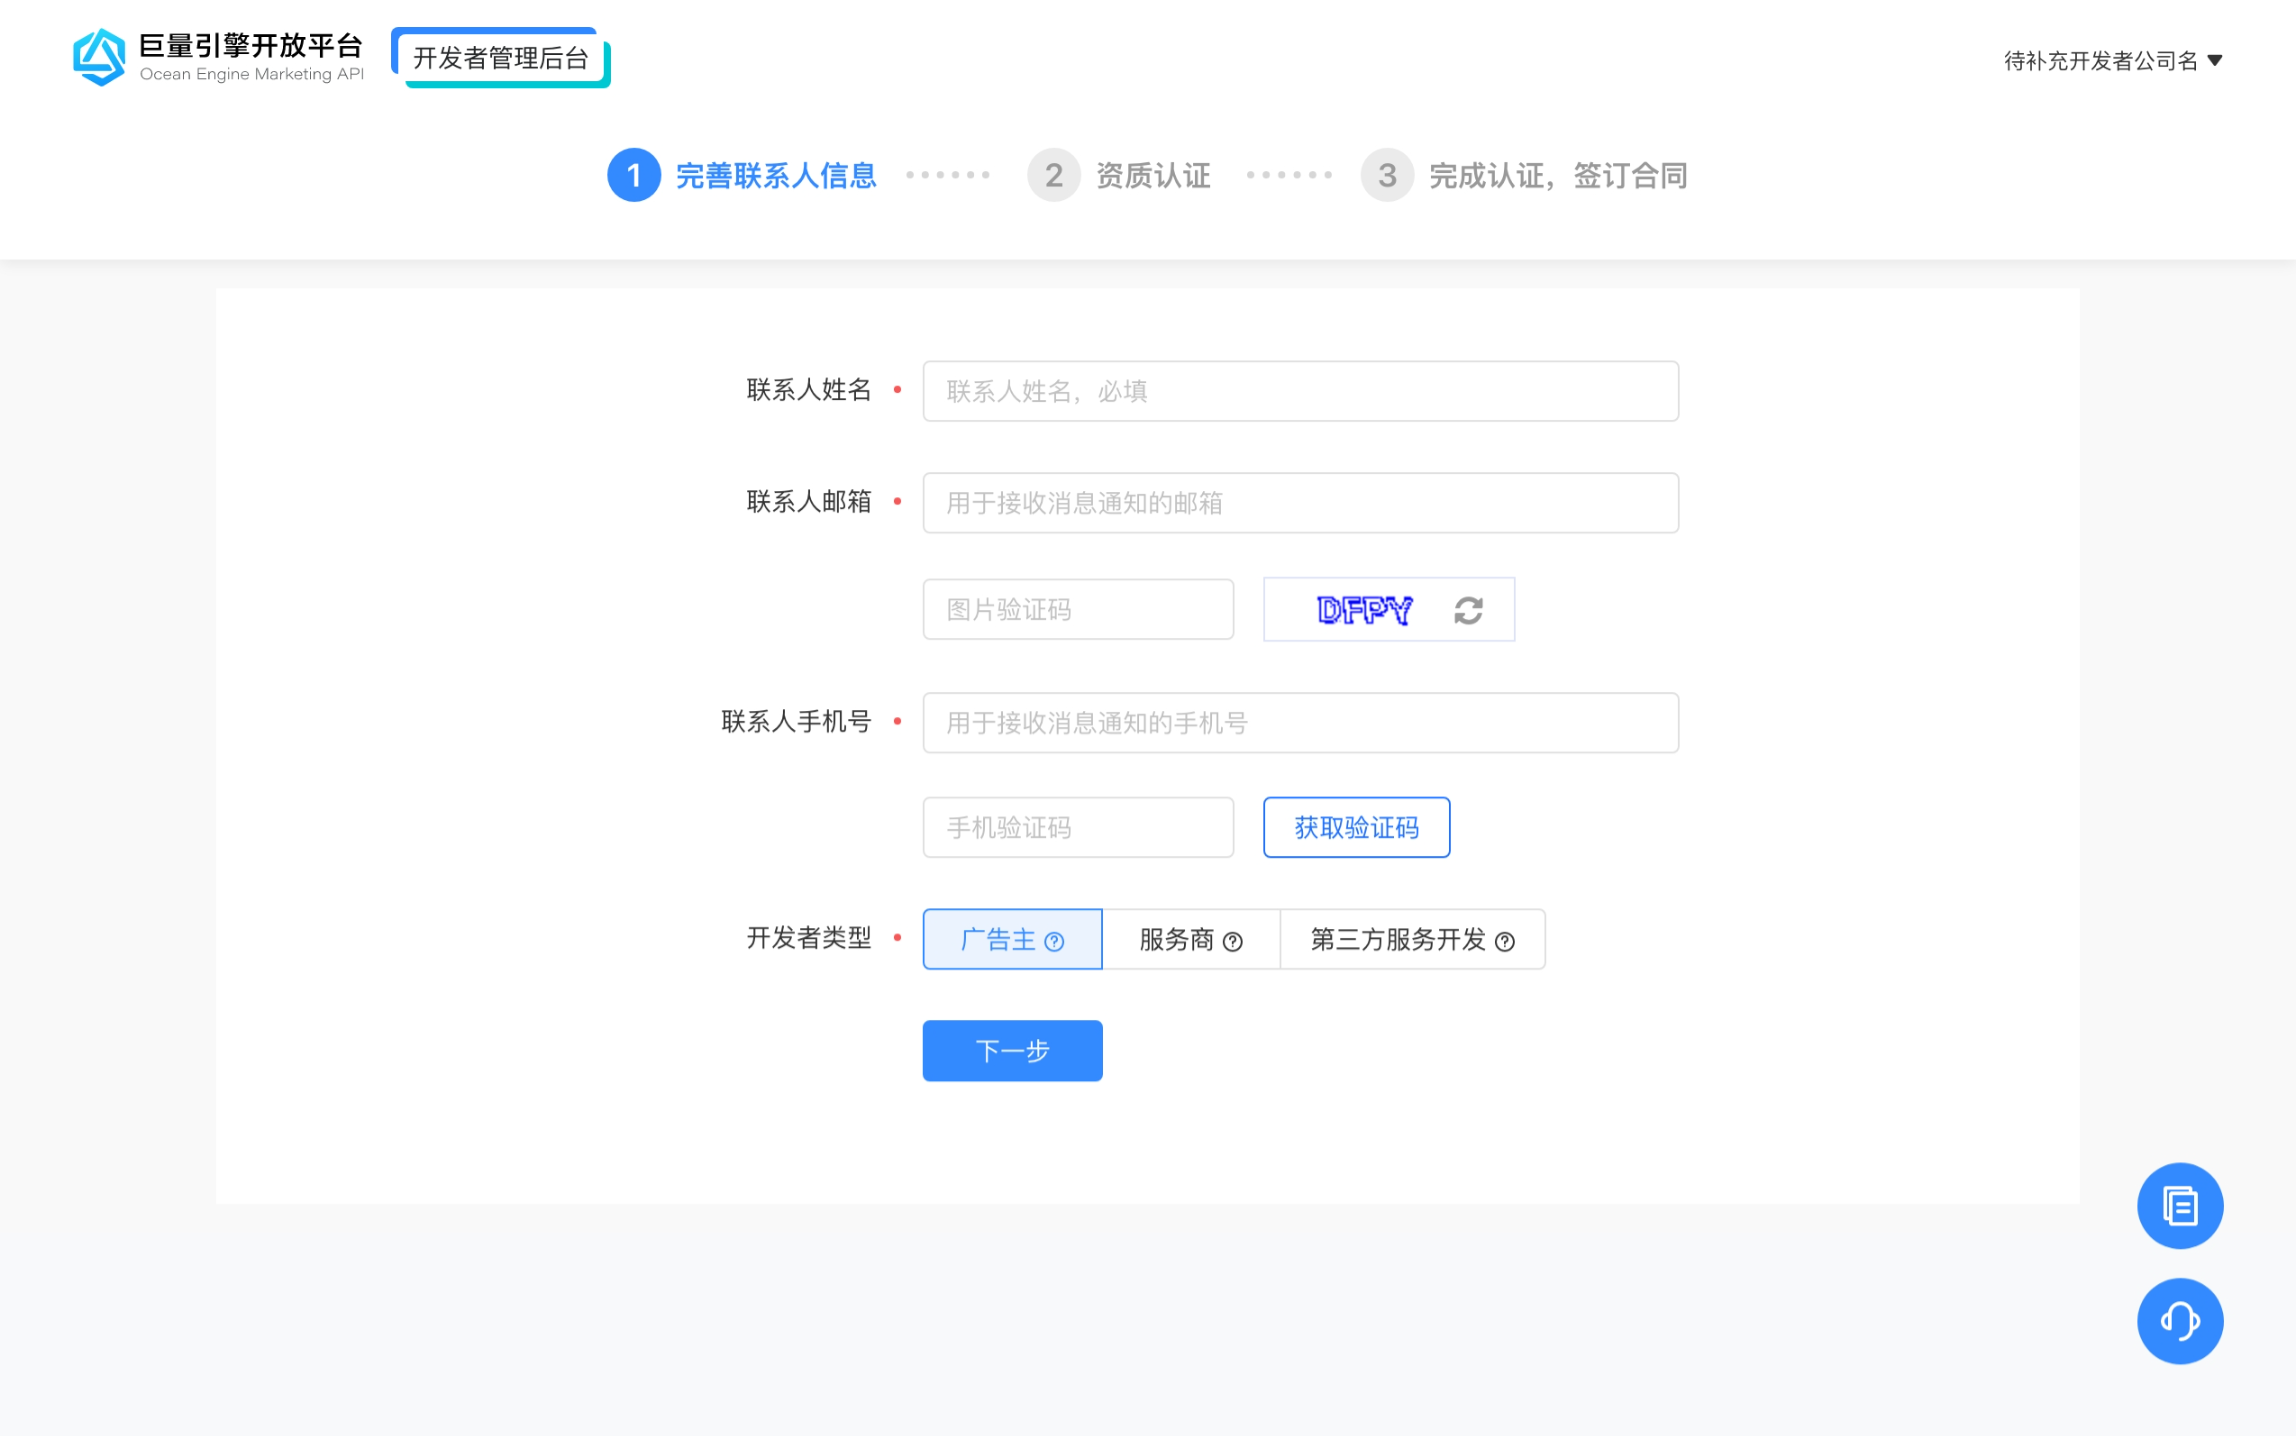
If you have not created a developer account, you need to complete the developer information and qualification review. Since a company can only register and authenticate one developer account, be sure to use a company email to apply and take good care of the account. You can refer to the official documentation (opens new window) for the specific application process. You need to choose between advertiser/agency for the developer type, depending on your actual situation. The differences between the two are as follows:
- Advertiser: Can only apply for authorization of vertical and horizontal organization accounts with the same company subject as the developer account
- Agency: Can only apply for authorization of agency accounts with the same company subject as the developer account.
After the developer account is authenticated, please go to the developer website and enter the "APPID Management" page, and select to create an application of the "advertising management" type.
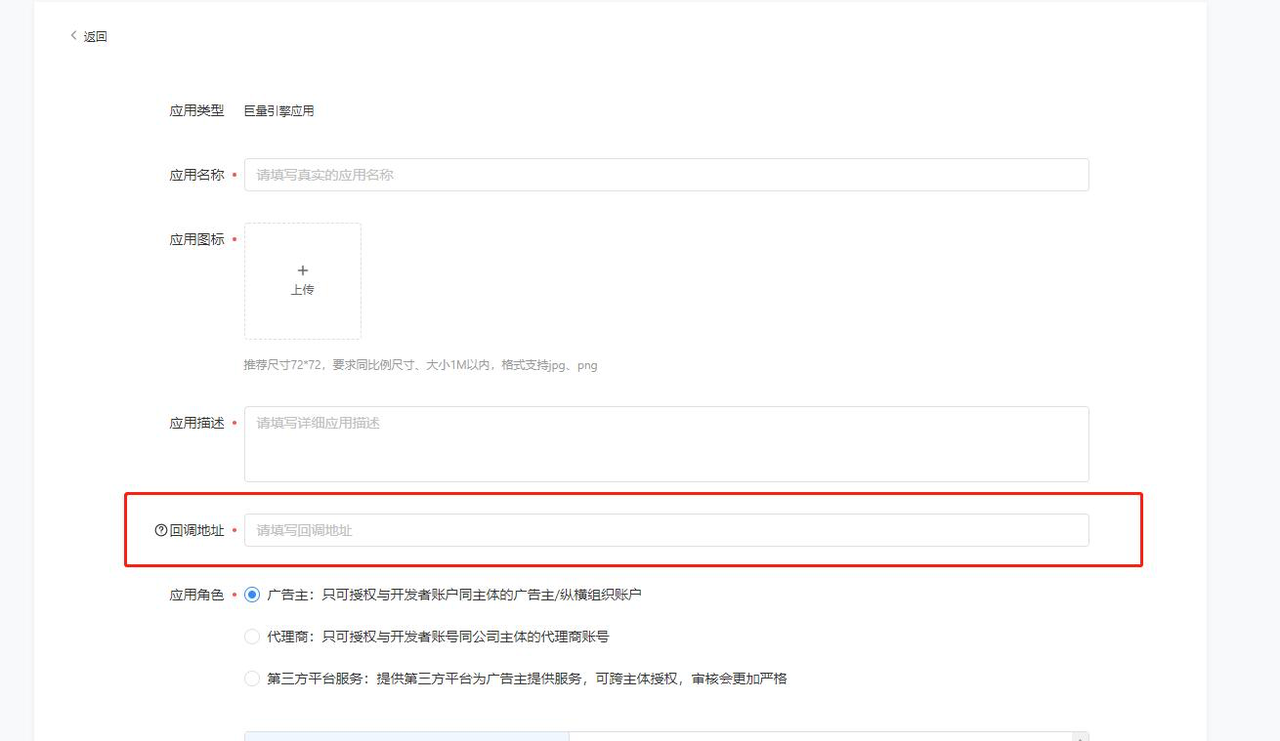
- In the callback address, please enter "www.thinkingdata.cn (opens new window)" first. Please note that the callback address filled in at this time is not a valid address, and the valid address needs to be obtained later and returned to the application page for modification.
- In the permission scope, "data report" permission needs to be selected.
- After the application is submitted, OceanEngine will complete the review of your application creation (APPID) application within one working day.
# 1.2 Obtain App ID and App Secret
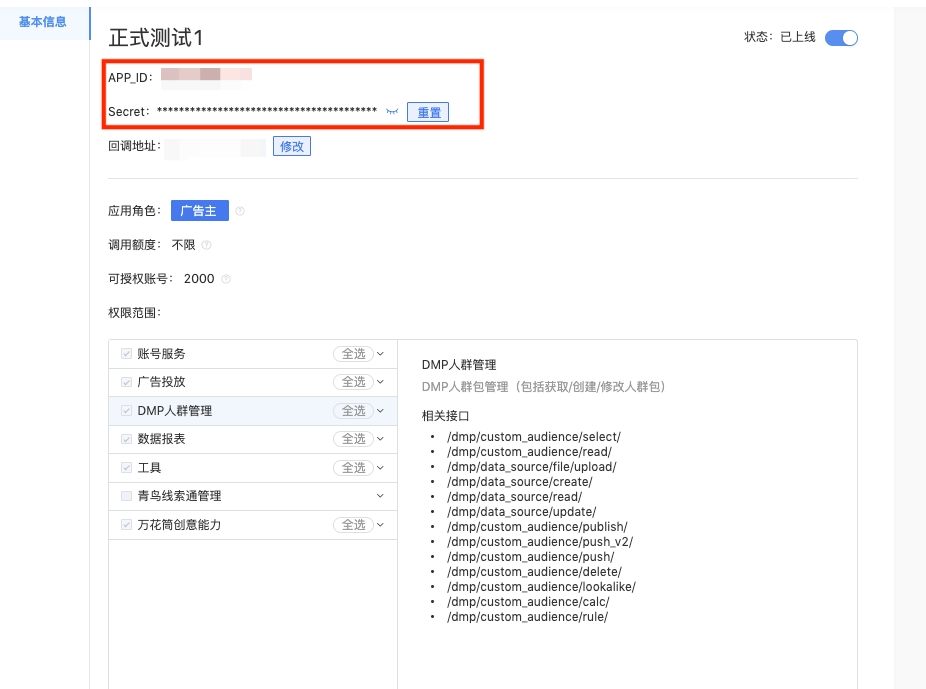
After completing the application, please enter the developer backstage, find "Application Management"-"Basic Application" from the left sidebar, select the created application, click "Edit" to enter the "Basic Information" page, find the APP_ID and Secret, and copy them.
# 1.3 Obtain the login user ID
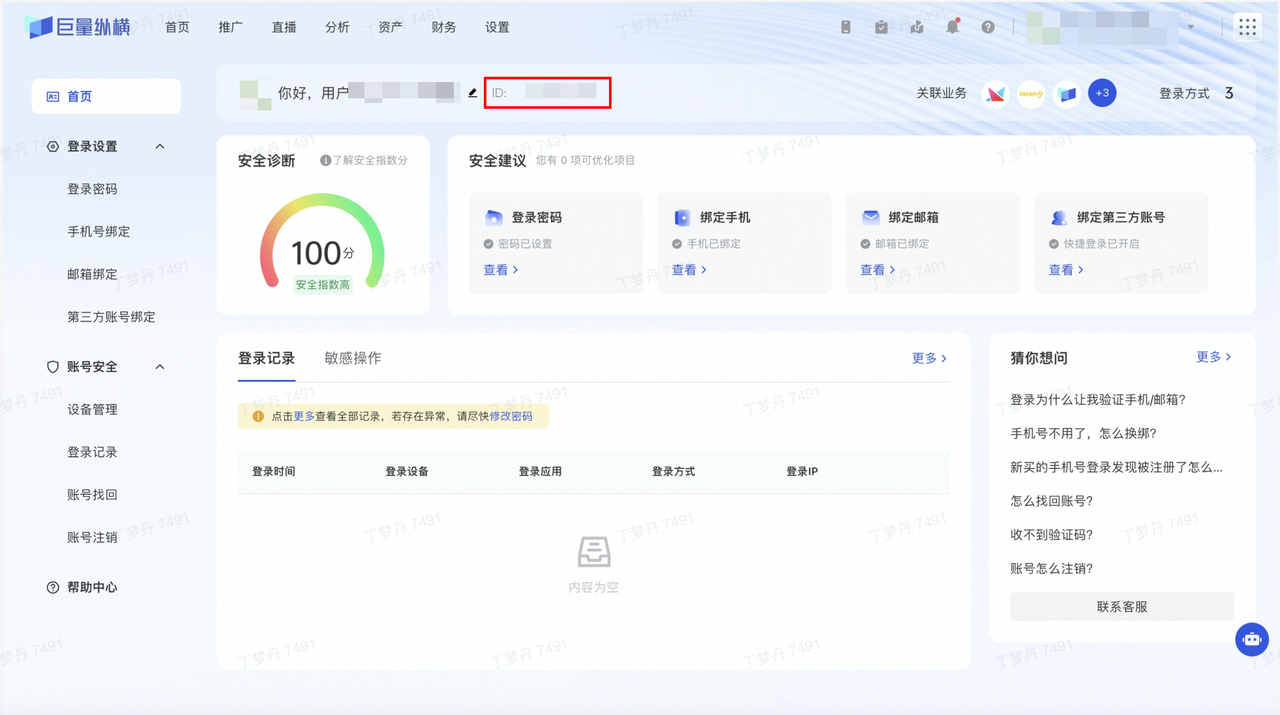
Next, please go to the "OceanEngine Development Platform", click on the "hexagonal logo" in the upper right corner, click "OceanEngine" to enter the backstage, click on "Account Information and Security" in the upper right corner, find the login user ID, and copy it.
# Obtain Callback URL on TE Third-Party Integration Page
After creating the application, you need to log in to the TE system backstage and complete the callback address of the OceanEngine in the "Third-Party Integration" module. The following figure shows the configuration interface of the OceanEngine. Please turn on the "Integration Switch" to start configuring the OceanEngine:
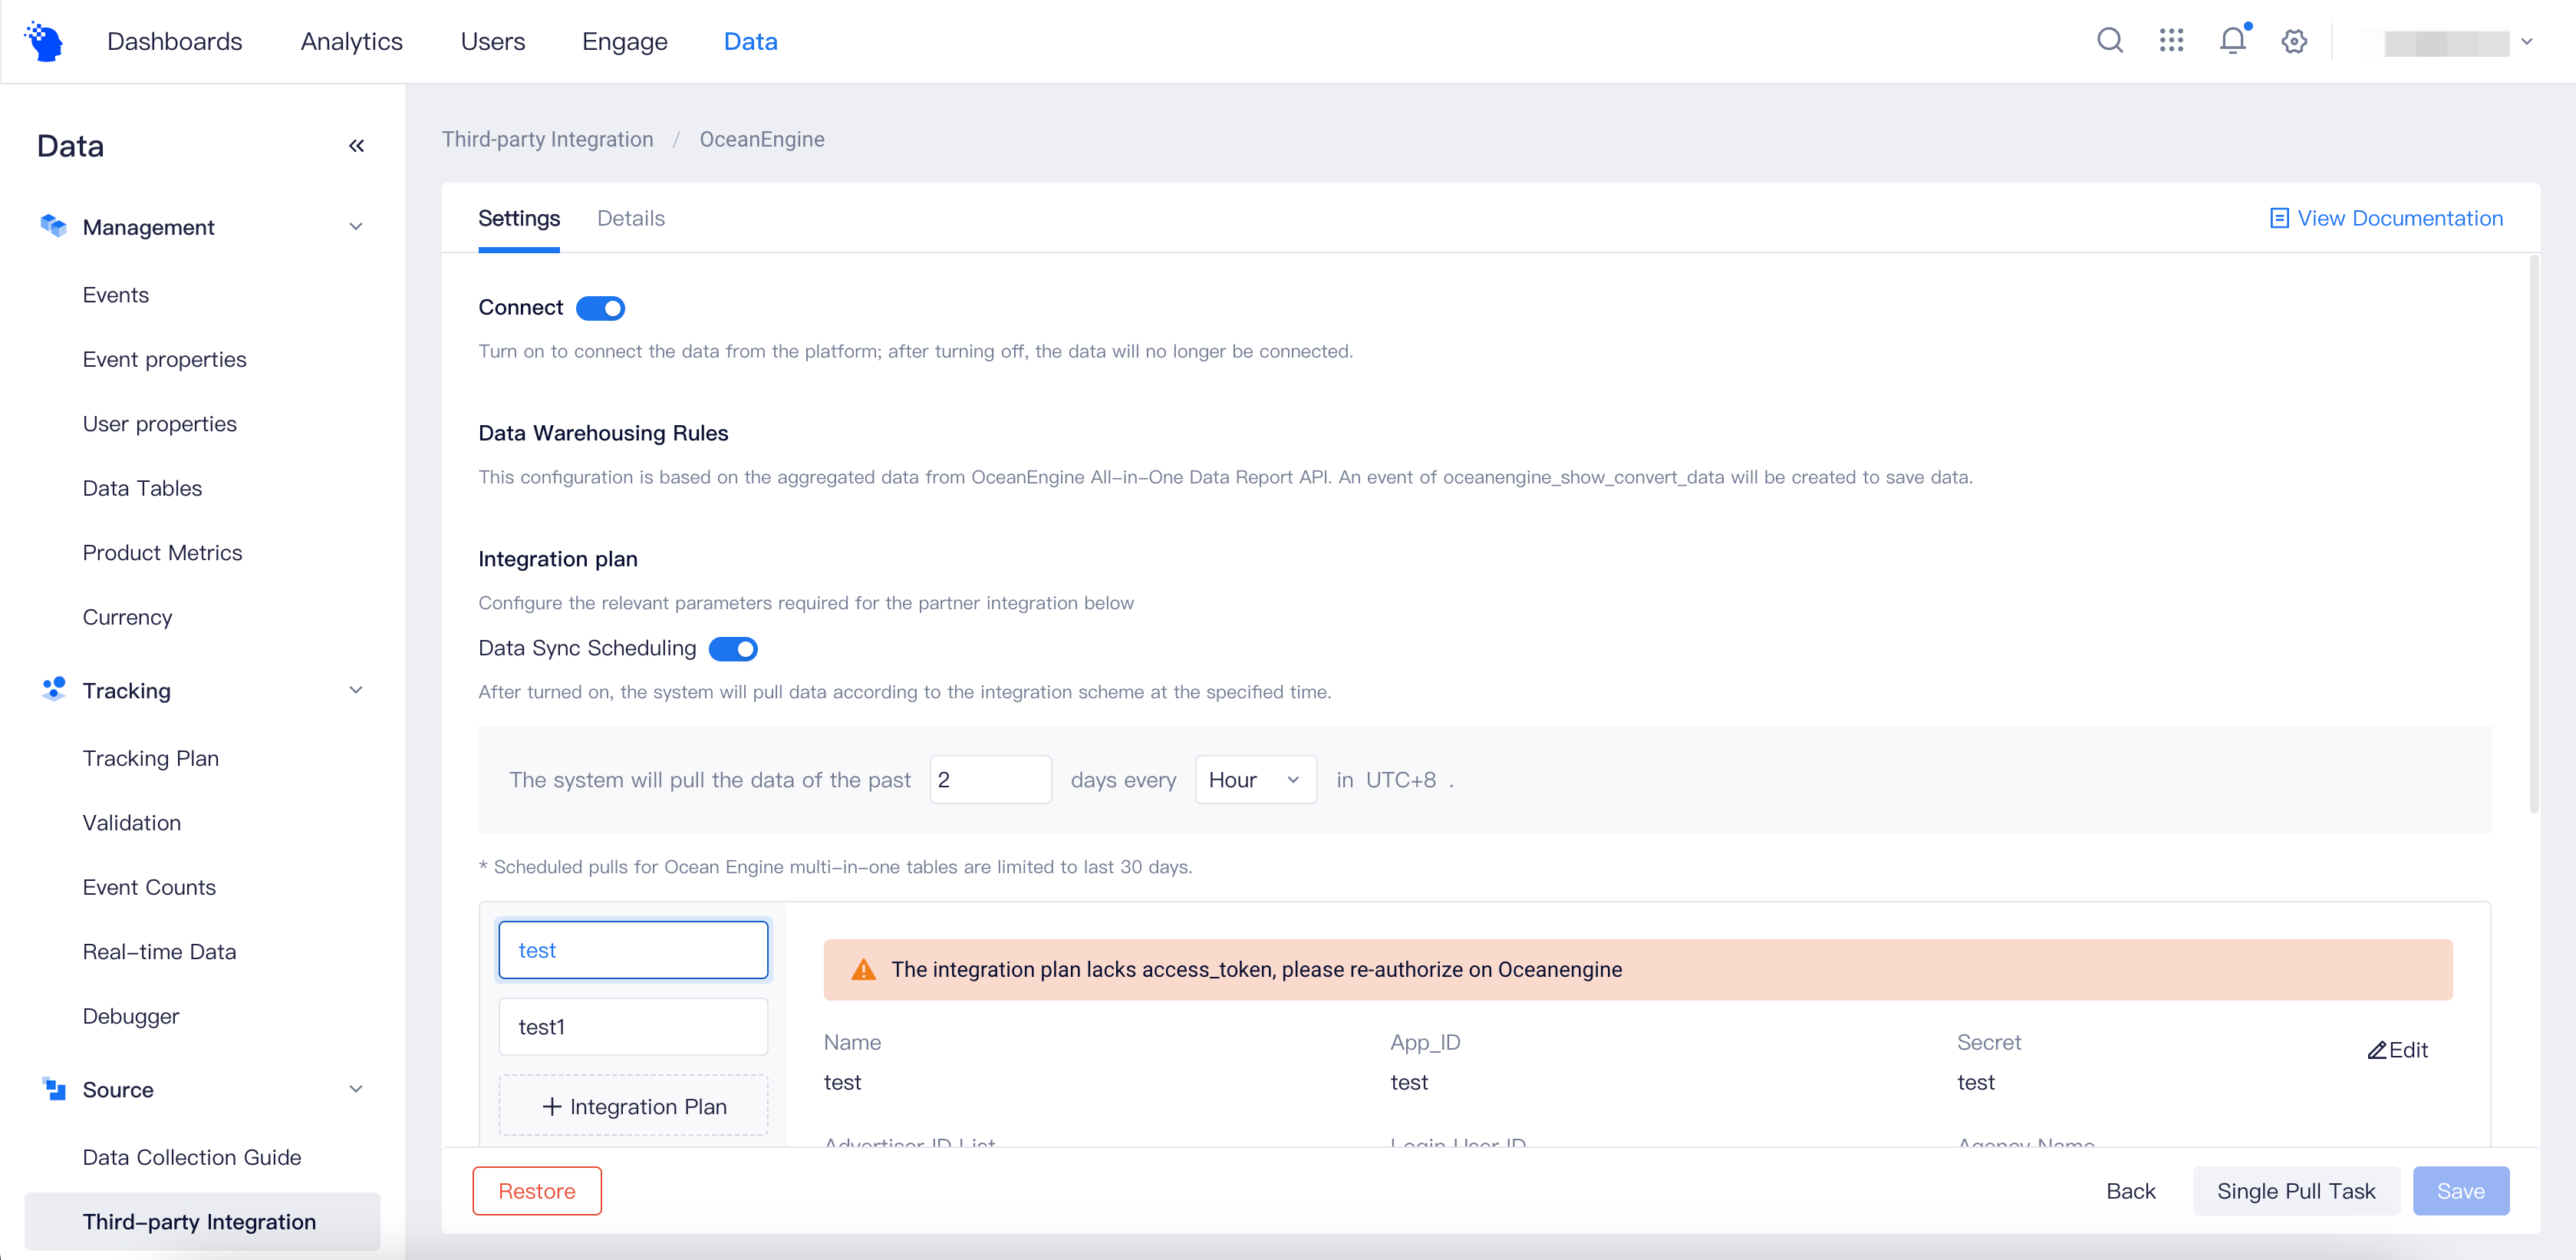
Please start with the integration plan. First, click the button to add an integration plan:
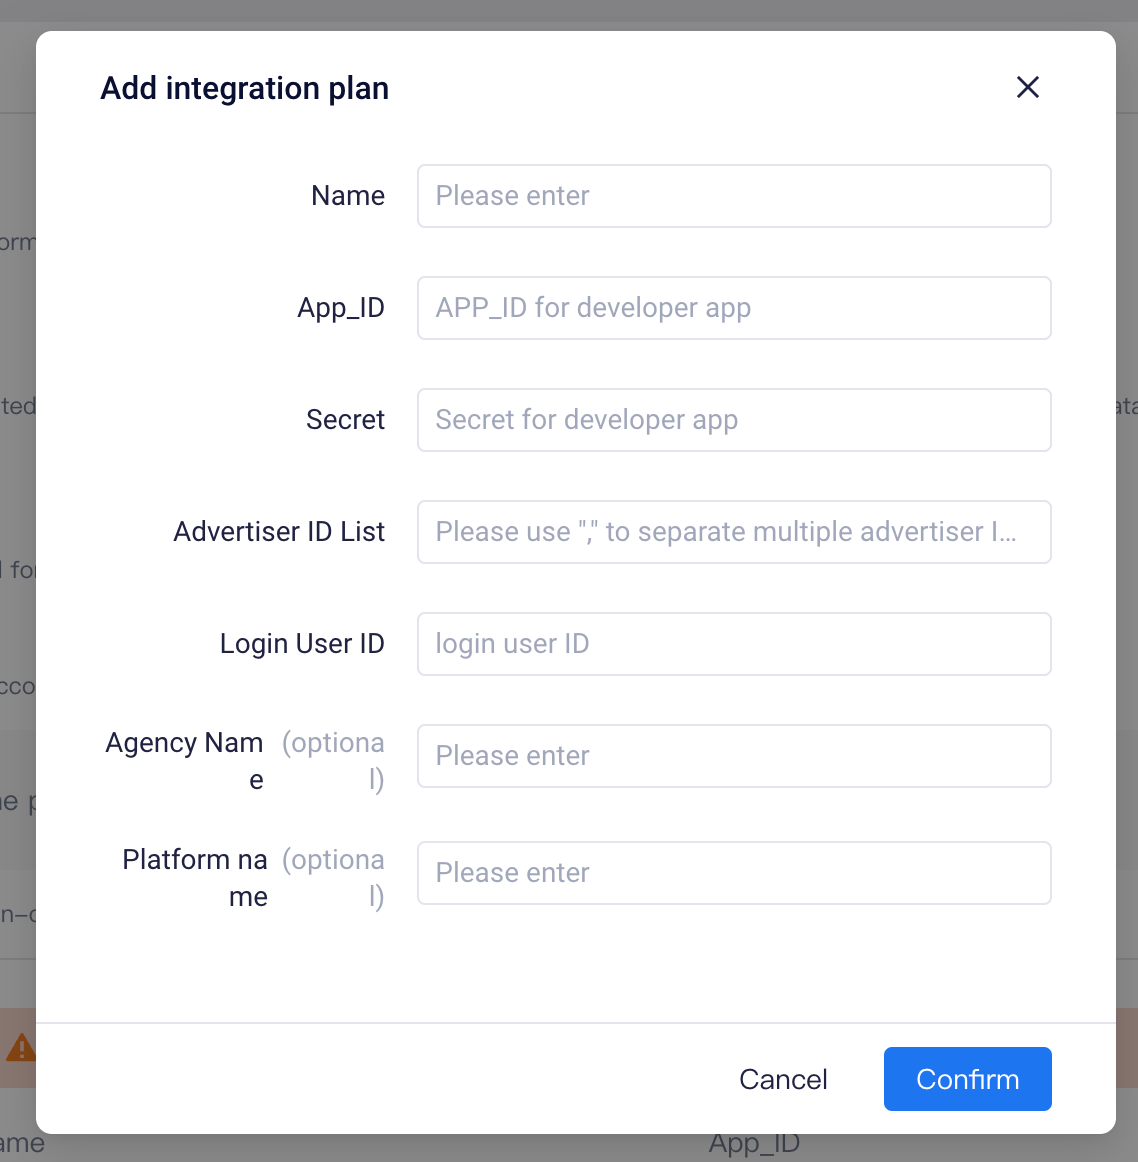
Please fill in the following information, where the APP_ID, Secret, and login user ID are all introduced in the previous section on how to obtain them:
| Parameter Name | Description | How to get | Required |
|---|---|---|---|
| Name | Customizable plan name | Yes | |
| APP_ID | The APP ID of the application created in the OceanEngine backend | Developer platform APP application details page | Yes |
| Secret | The Secret of the application created in the OceanEngine backend | Developer platform APP application details page | Yes |
| Advertiser ID List | Advertisers (ad accounts) used for advertising on the OceanEngine backend | "Account" tab on the "Promotion" page of the OceanEngine business management platform | Yes |
| Login User ID | Login user ID (non-login email) used to log in to the OceanEngine backend | API authorization interface | Yes |
| Agency Name | Optional | ||
| Platform name | iOS or Android, optional |
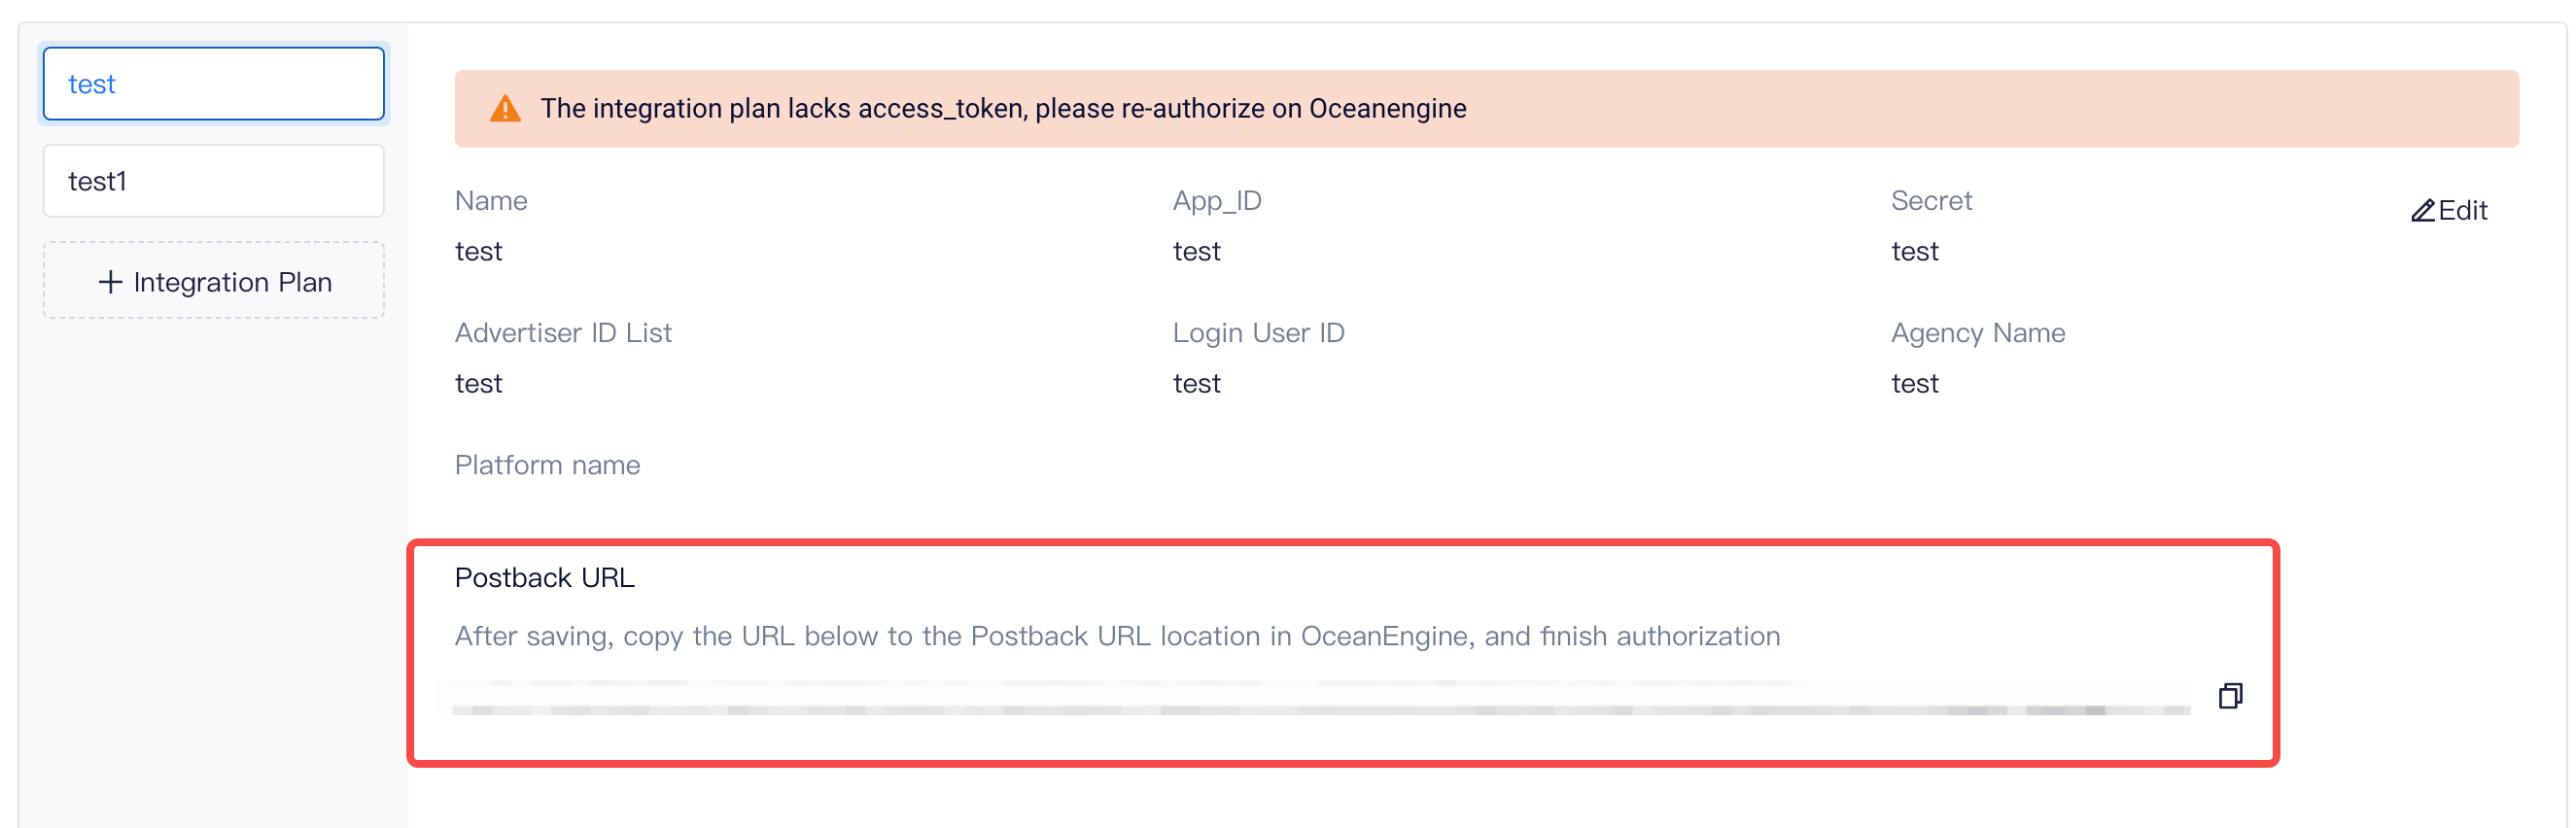
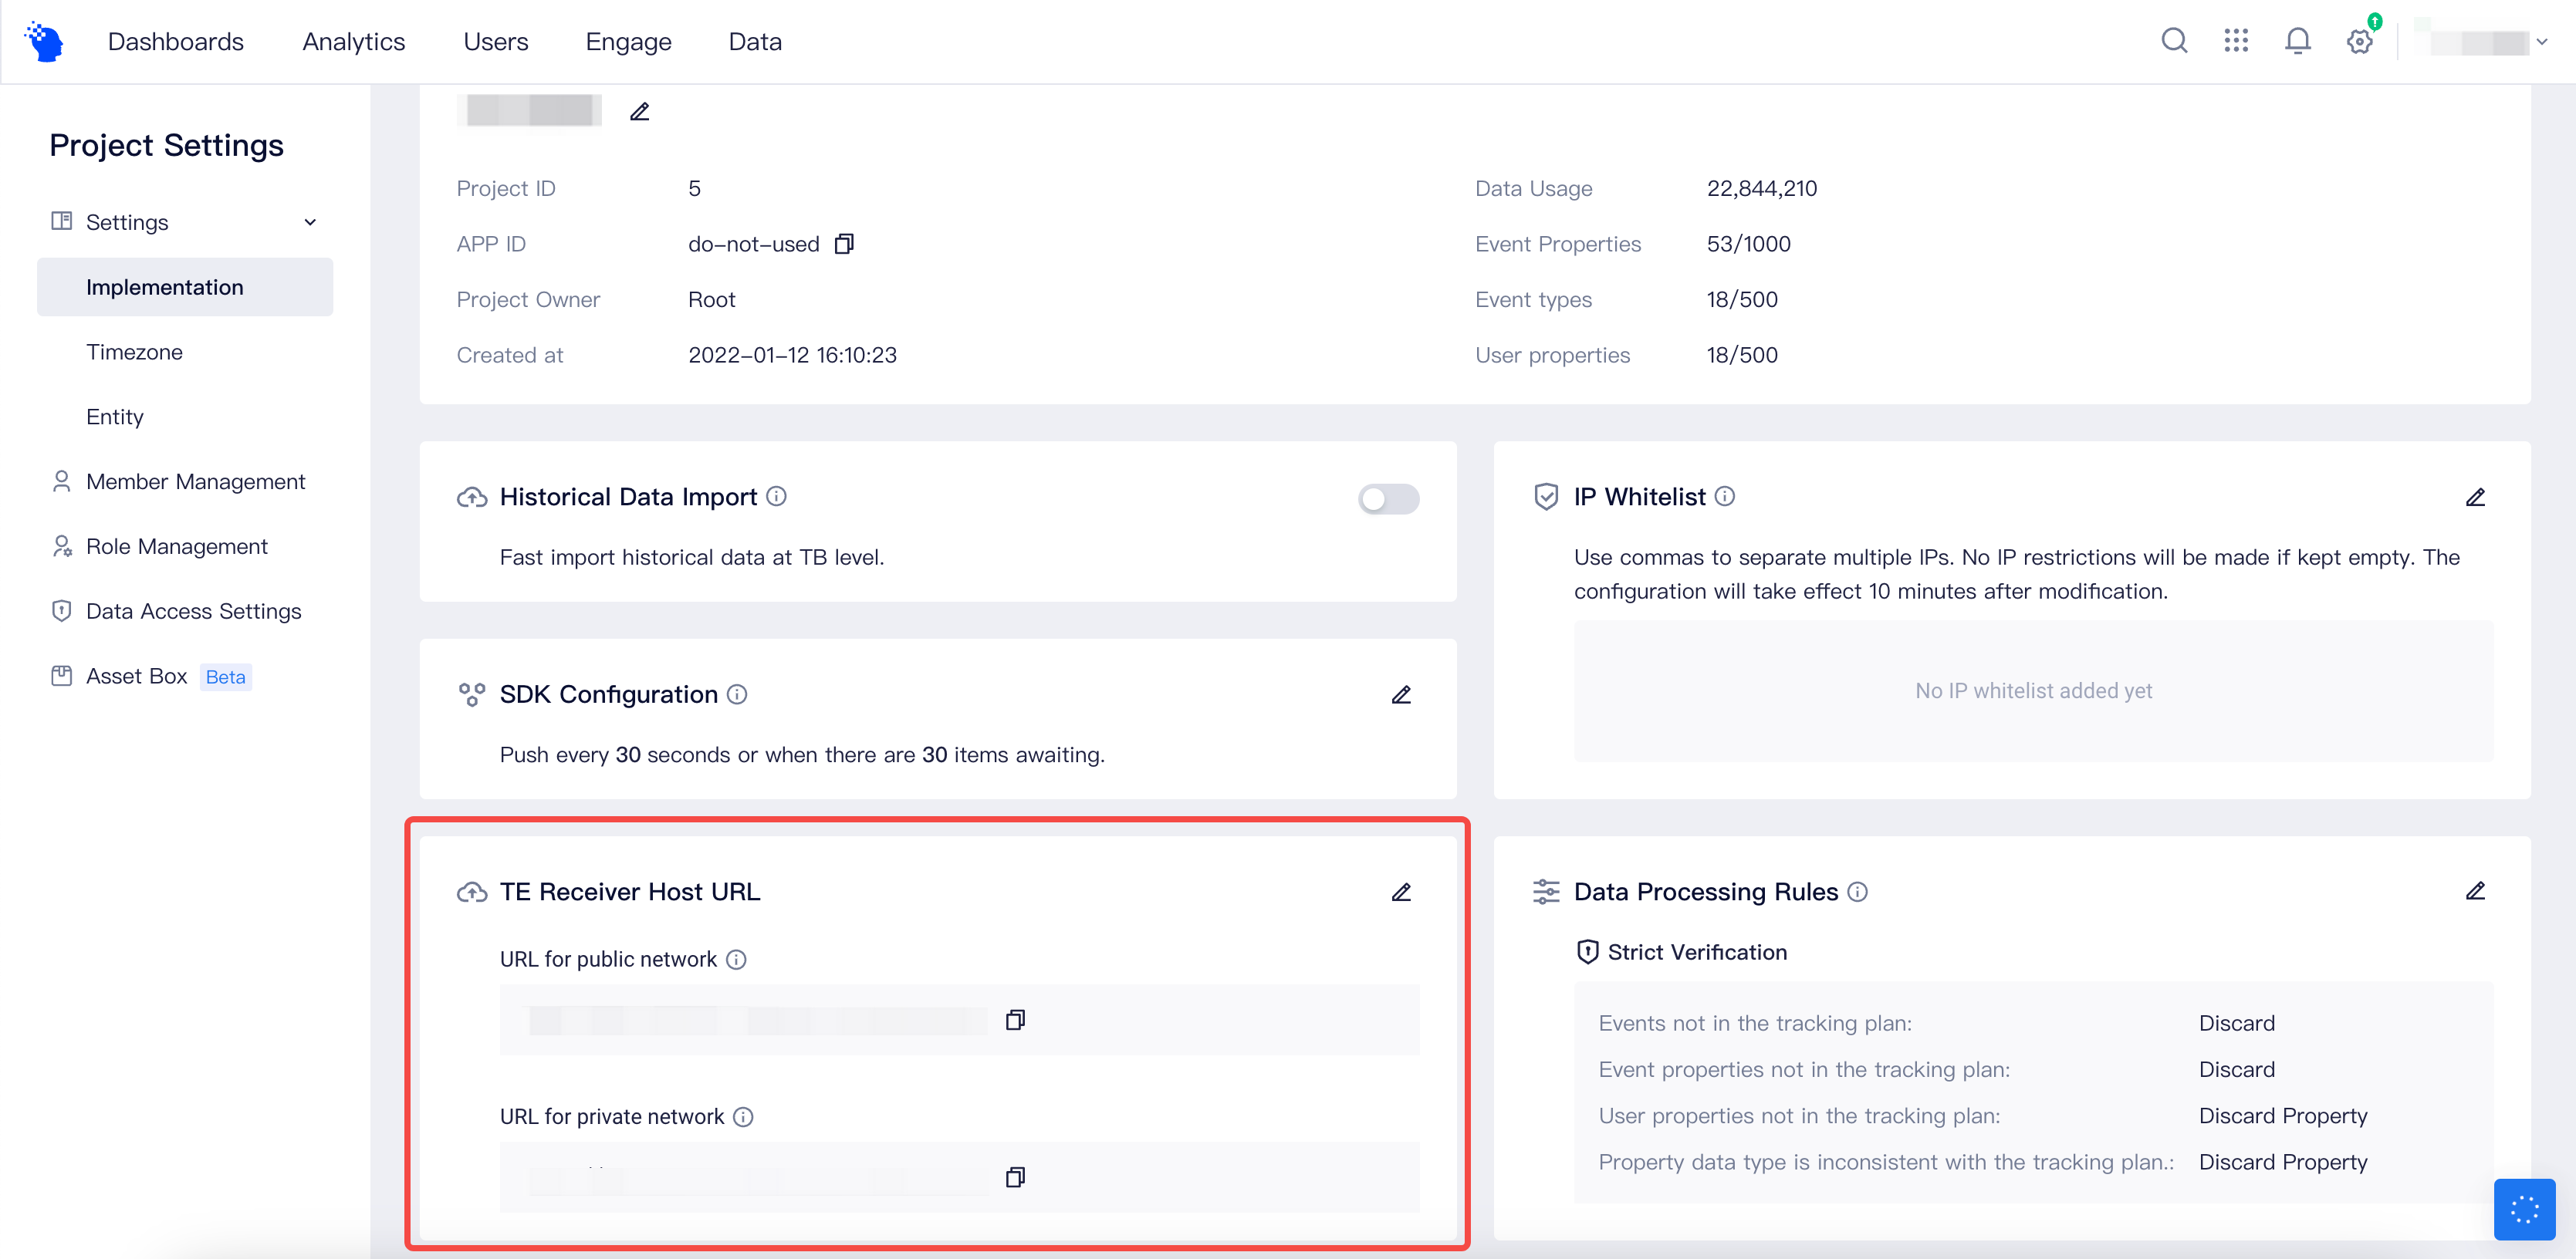
After filling in, click "Confirm." The "Callback URL" will be displayed. Please copy and keep this address. Finally, be sure to click "Save Configuration" to complete the settings:
If there is no address displayed here, please go to the "Project Settings"-"Access Configuration"-"Data Reporting Address" in the upper-right corner menu to configure the public address. This address is the data reporting address configured in the TE SDK. After configuring, go back to the "Data Source" on the AppsFlyer configuration page to copy the terminal address.
# Complete Authorization on the OceanEngine
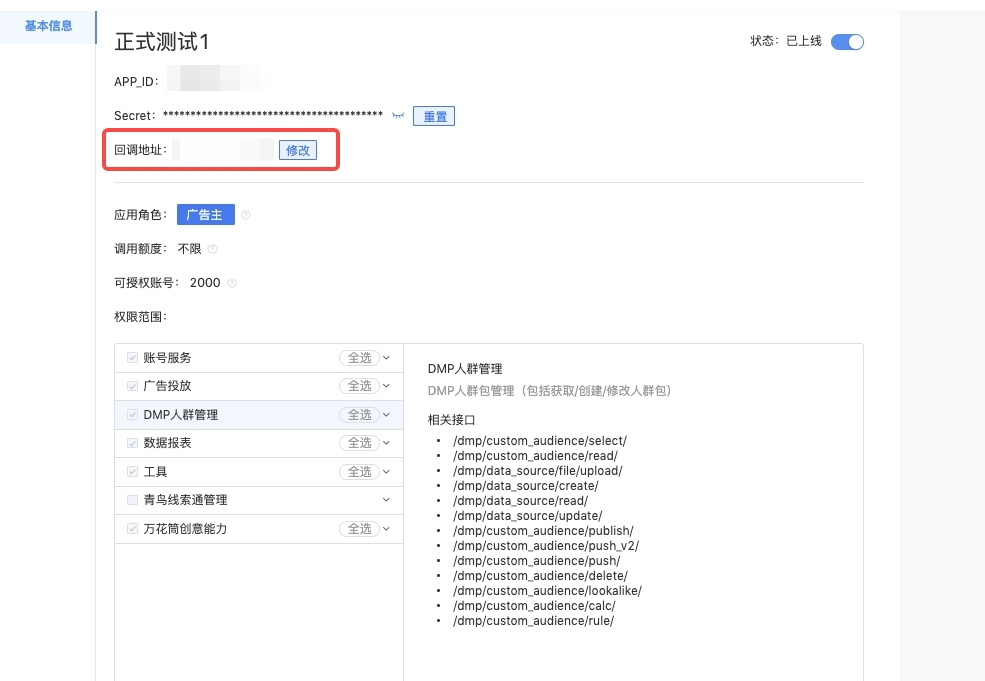
After saving the configuration and obtaining the callback URL, we need to return to the OceanEngine application page and modify the callback address of the application to the copied callback address. Please fill in the address in the "Callback Address" field on the application editing page.
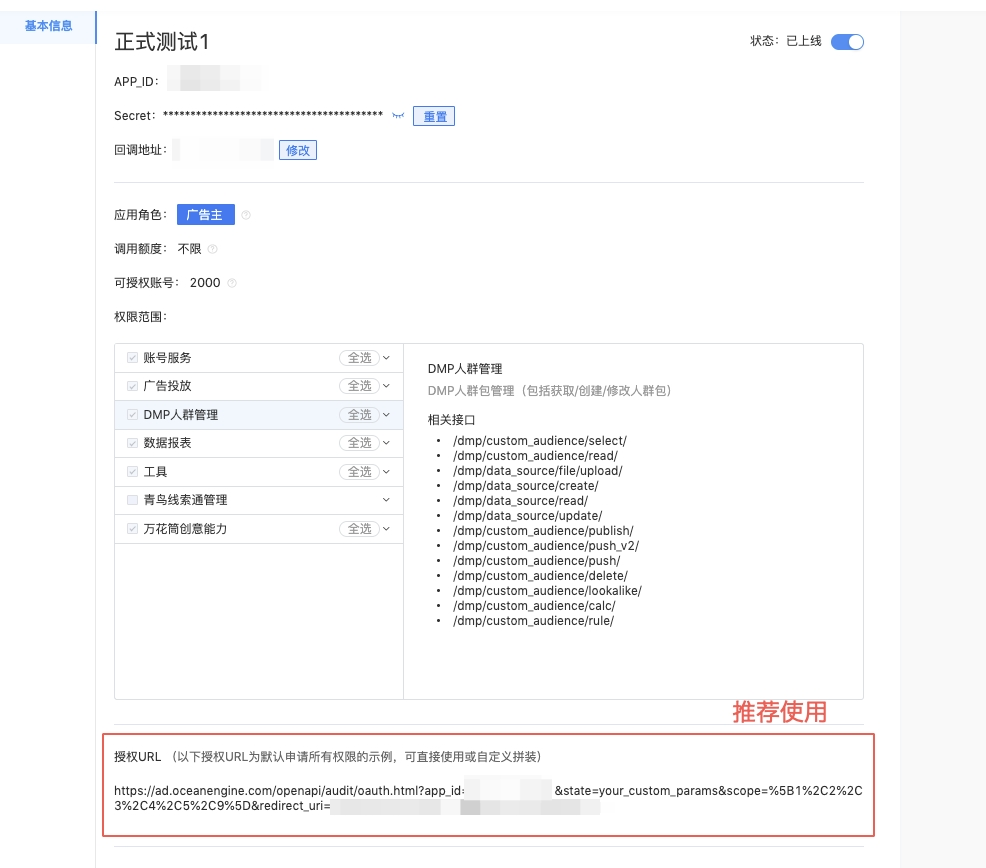
After filling in, you will be able to see the authorization URL at the bottom of the page. Copy and open it in a browser.
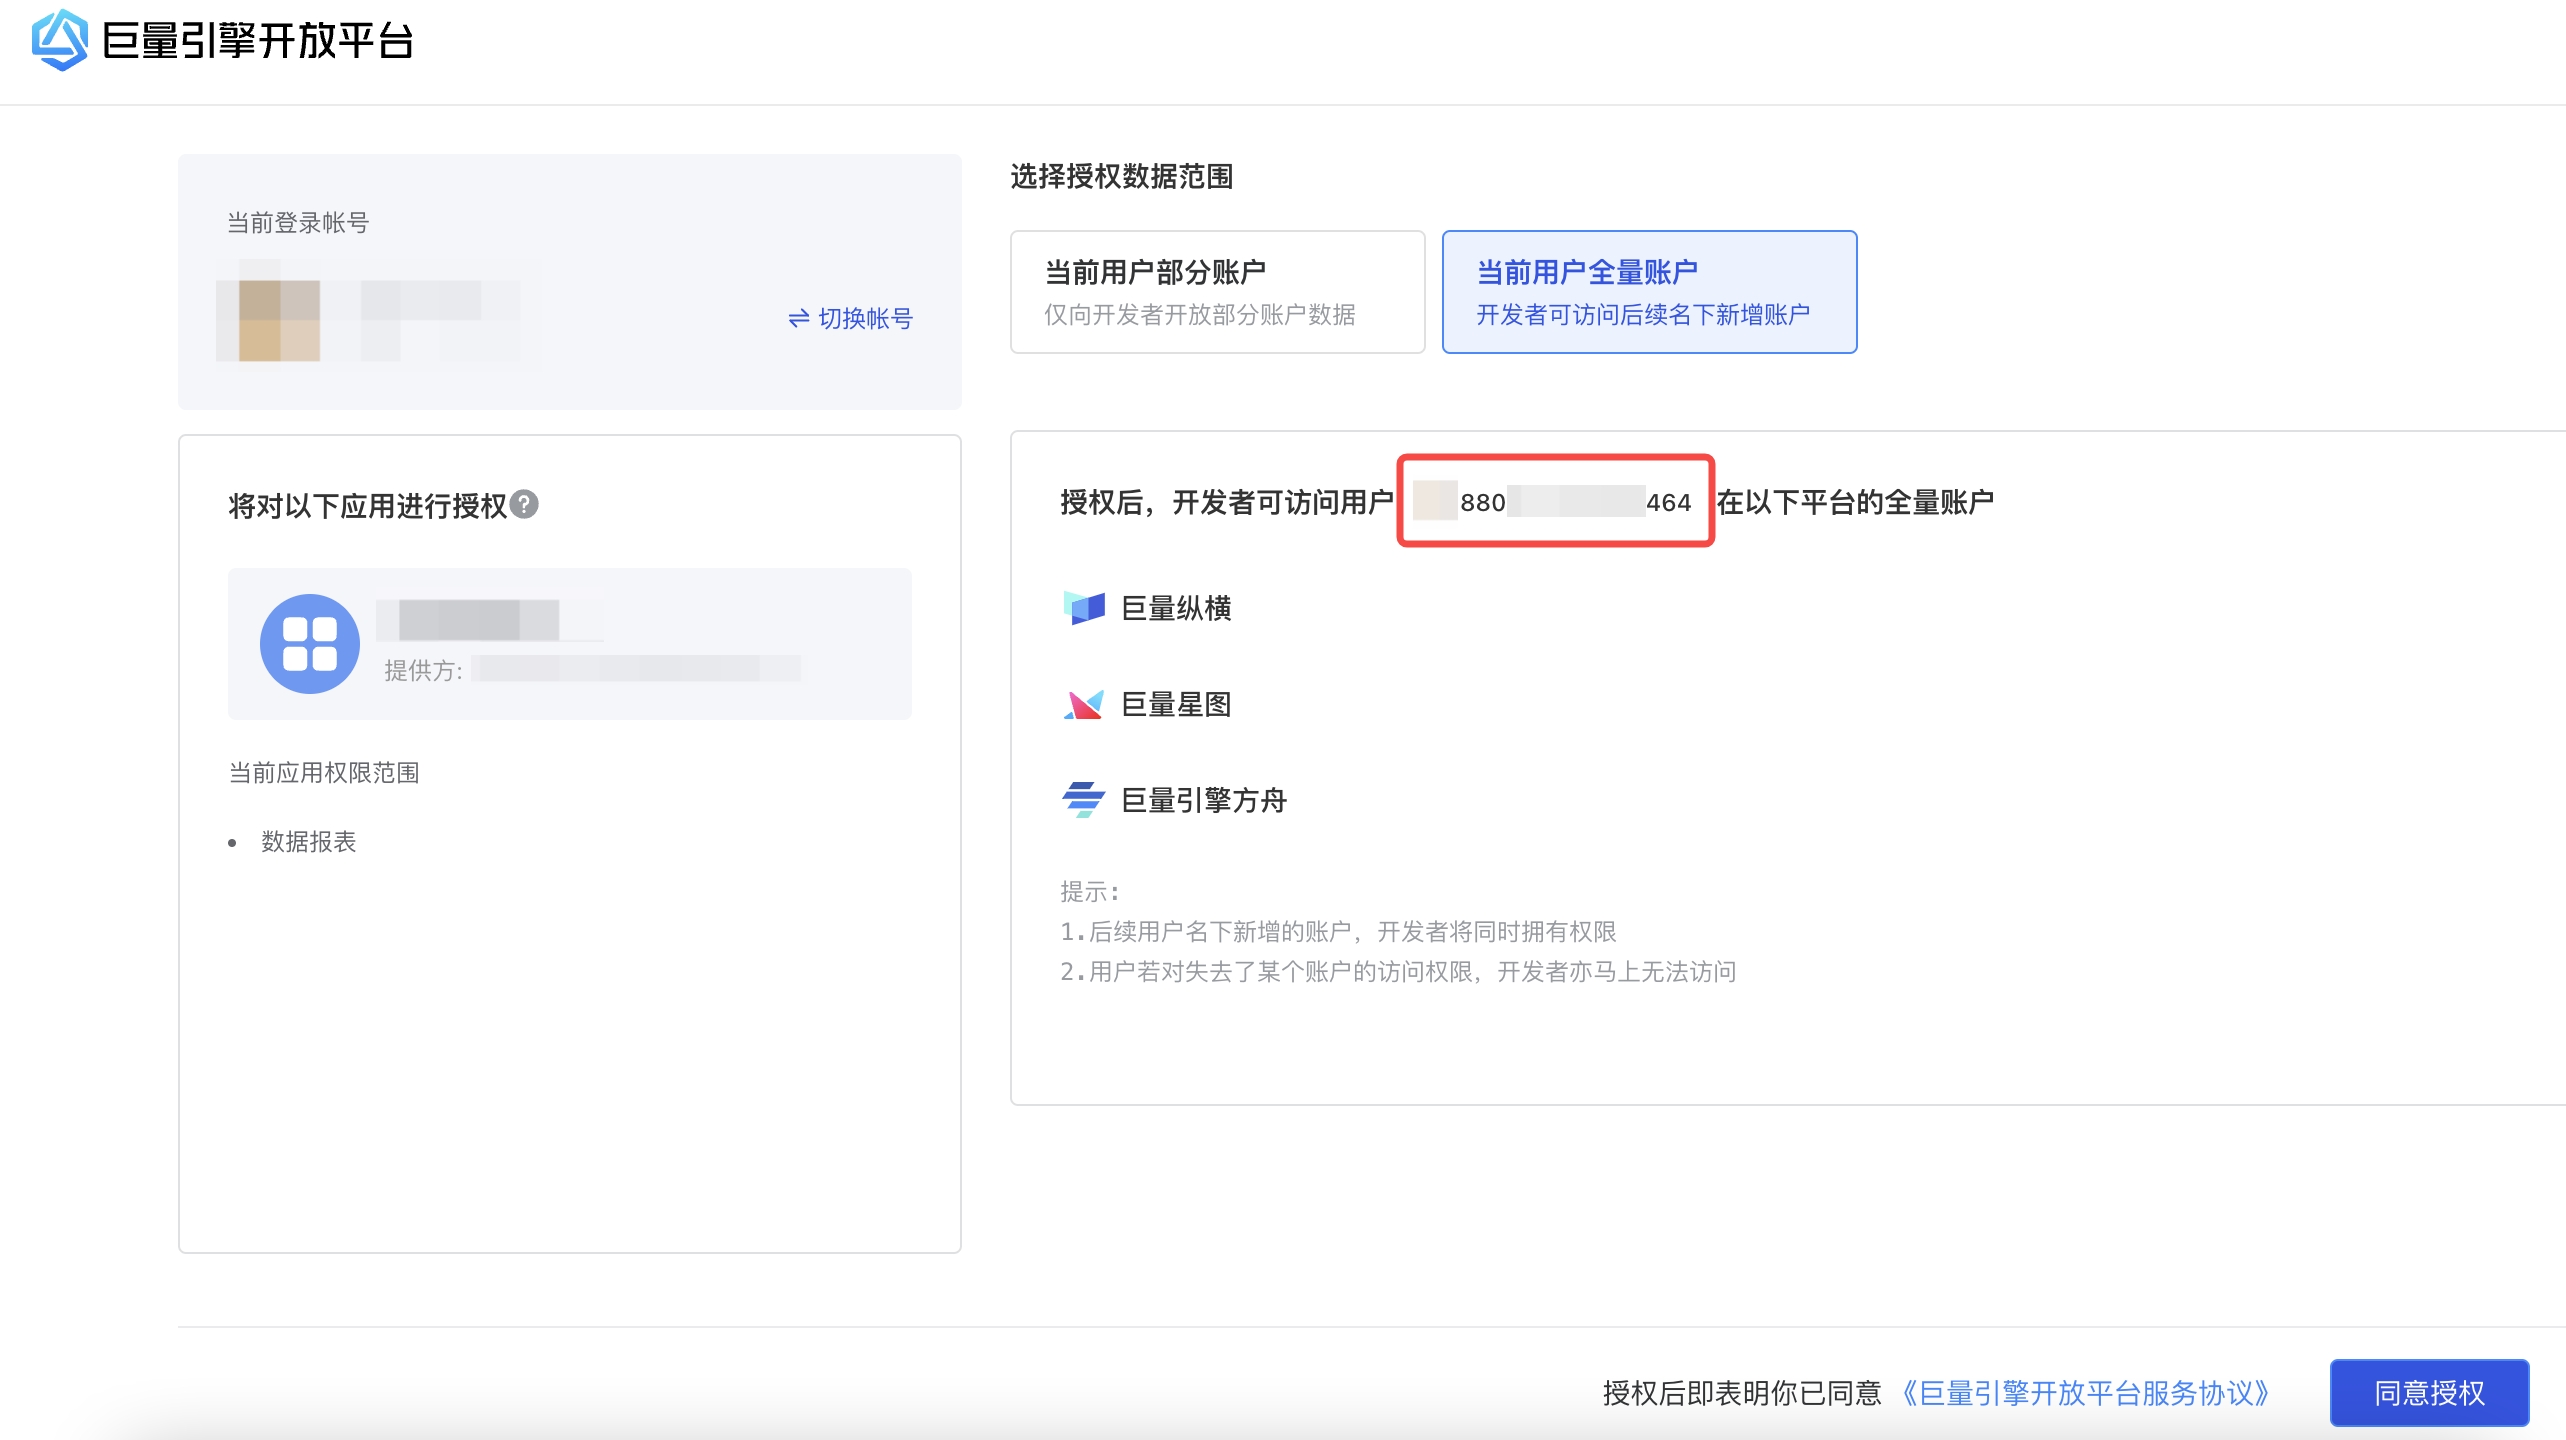
You will see the authorization interface. Select "Current User Full Account" and make sure that the "Current Login User" has the advertising account that you need to pull data from. Please confirm that the login user ID in the red box is consistent with the login user ID in the OceanEngine integration plan. After confirming, click "Agree to Authorize" to complete the authorization process.
# Complete Final Configuration on the TE Platform
Finally, please return to the TE third-party integration page to complete the configuration of other parameters for the OceanEngine integration.
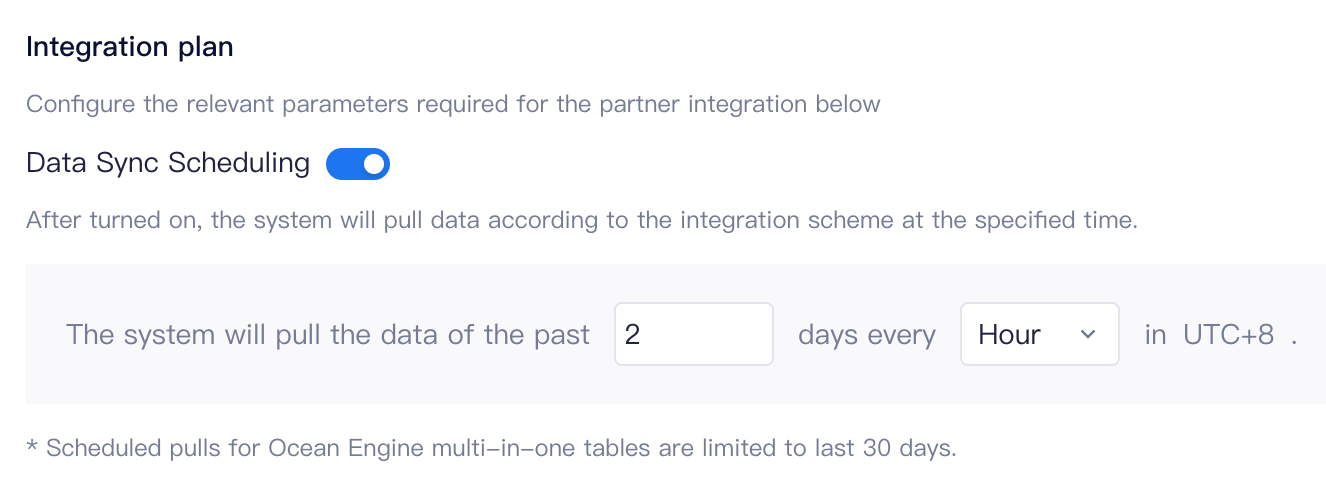
# 4.1 Data Sync Scheduling
You can configure the TE system to pull data according to a scheduled strategy, such as pulling data for a period of time every day or every hour. Please note that the OceanEngine multi-in-one data report only supports pulling data for up to the past 30 days.
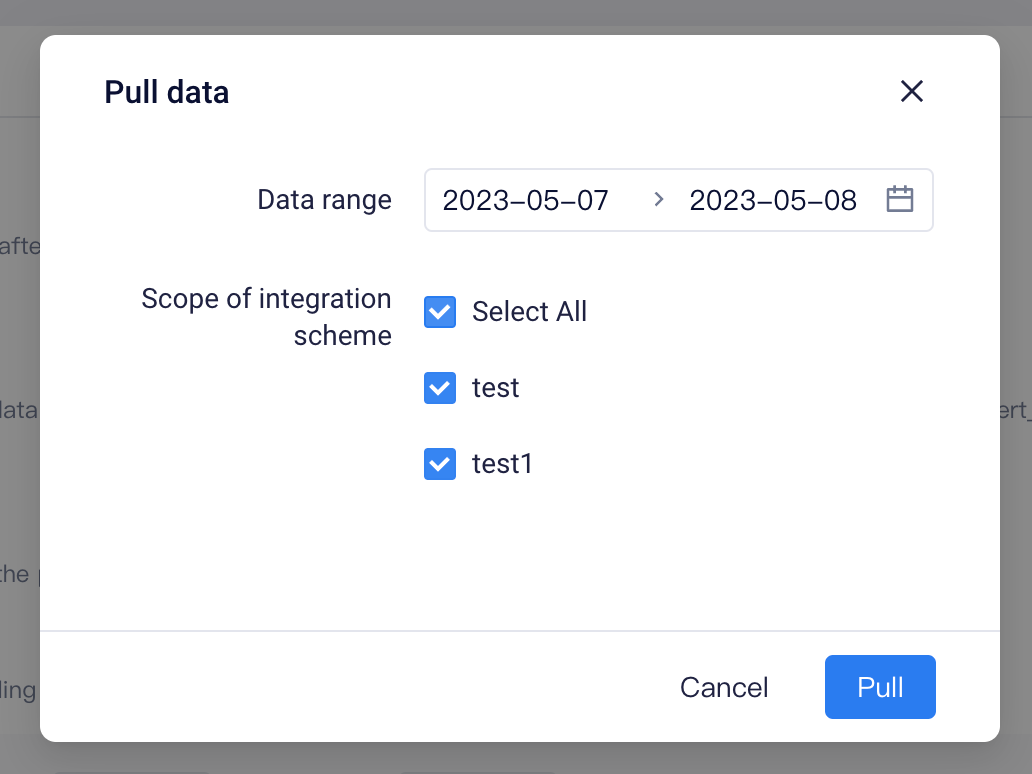
# 4.2 Single Pull Task
In addition to scheduled pulling, you can also click the one-time pulling button in the lower right corner of the configuration page to manually trigger a data pull. In the data pulling popup window, please set the data range that needs to be pulled and which plans need to be pulled.
# Data Storage Rules
# 5.1 User Identification Rules
Since the OceanEngine multi-in-one data report is an aggregate metric, the TE system will set a special user ID for these data, which will not be associated with actual users and will not affect normal analysis and use.
# 5.2 Event Storage Rules
- Use the "stat_datetime" field in the data as the #event_time for the aggregated data. Currently, OceanEngine pulls data at the hourly level, so "stat_datetime" is also the time accurate to the hour.
- The data event name is "--oceanengine_show_click_convert_data"
- All other fields will be stored.
# 5.3 Included Fields
The OceanEngine multi-in-one data report includes the following event properties, of which some fields will be standardized by the TE system:
| Original Field | Meaning | Standardized Field |
|---|---|---|
| stat_datetime | Time | |
| advertiser_id | Advertiser ID | te_ads_object.ad_account_id |
| campaign_name | Ad group name | te_ads_object.campaign_name |
| campaign_id | Ad group ID | te_ads_object.campaign_id |
| ad_name | Ad campaign name | te_ads_object.ad_group_name |
| ad_id | Ad campaign ID | te_ads_object.ad_group_id |
| creative_name | Creative name | te_ads_object.ad_name |
| creative_id | Creative ID | te_ads_object.ad_id |
| active | Activations | |
| active_cost | Activation cost | |
| active_pay_cost | First payment cost | |
| active_pay_rate | First payment rate | |
| active_rate | Activation rate | |
| active_register_cost | Registration cost | |
| active_register_rate | Registration rate | |
| attribution_active_pay_7d_per_count | 7-day average payment frequency per user | |
| attribution_convert | Conversions (billing time) | |
| attribution_convert_cost | Conversion cost (billing time) | |
| attribution_deep_convert | Deep conversions (billing time) | |
| attribution_deep_convert_cost | Deep conversion cost (billing time) | |
| avg_click_cost | Average click price | |
| avg_show_cost | Average cost per thousand impressions | |
| click | Clicks | te_ads_object.clicks |
| click_install | Click installs | te_ads_object.installs |
| convert | Conversions | |
| convert_cost | Conversion cost | |
| convert_rate | Conversion data-conversion rate | |
| cost | Total spending | te_ads_object.cost |
| ctr | Click-through rate | |
| deep_convert | Deep conversions | |
| deep_convert_cost | Deep conversion cost | |
| deep_convert_rate | Deep conversion rate | |
| download | Download start | |
| game_addiction | Key action count | |
| game_addiction_cost | Key action cost | |
| game_addiction_rate | Key action rate | |
| game_pay_cost | Payment cost | |
| game_pay_count | Payment count | |
| pay_count | First payment count | |
| show | Impressions | te_ads_object.impressions |
# 5.4 User Properties Storage Rules
The OceanEngine multi-in-one data report will not write to the user table.
# Data Storage Check
Finally, please check whether the TE system has received data from OceanEngine. You can check as follows:
- Check if the "oceanengine_show_click_convert_data" event has been created on the "Data Management" - "Meta Event" page.
- You can also query if there is data for "oceanengine_show_click_convert_data" in the event analysis model.