# Data Clearing Tool
# I. Introduction
The data clearing tool is used to clear the data in the TA system. It supports the clearing of event data according to the time period and event type, or the clearing of full data (including user data). The Meta data (i.e. table structure) of the event table and the user info table will not be cleared. If you need to clear the Meta data, it is recommended to directly create a new project and delete the old project.
WARNING
We recommend data deletion only when clearing test data and data anomalies. It is not recommended to delete data frequently. Please use this tool carefully.
# II. Instructions for Use
For 2.7 and previous versions, please execute ta-data-del to enter the data clearing tool
The data clearing tool is only available to the users of privatized services. root logs into any server of the privatized cluster and execute su - ta
Then executeta-tool data_del and enter the data clearing tool interface.
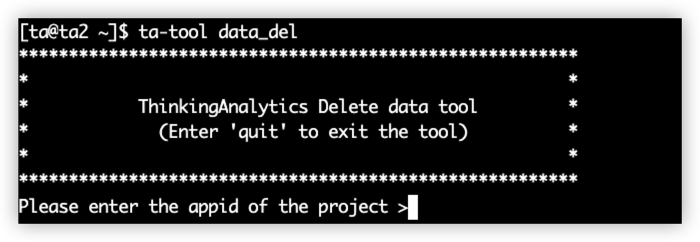
# 2.1 Fill in the appid of the project to be deleted
The appid of the project can be queried on the project management page in the TA background.
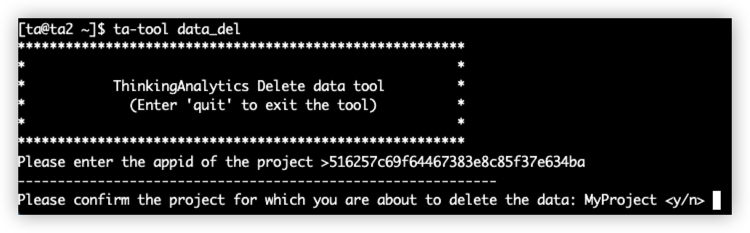
# 2.2 Confirm project name
After entering, the project name of the project to be deleted will be prompted. Enter 'y' to confirm, and enter 'n' to cancel the operation.
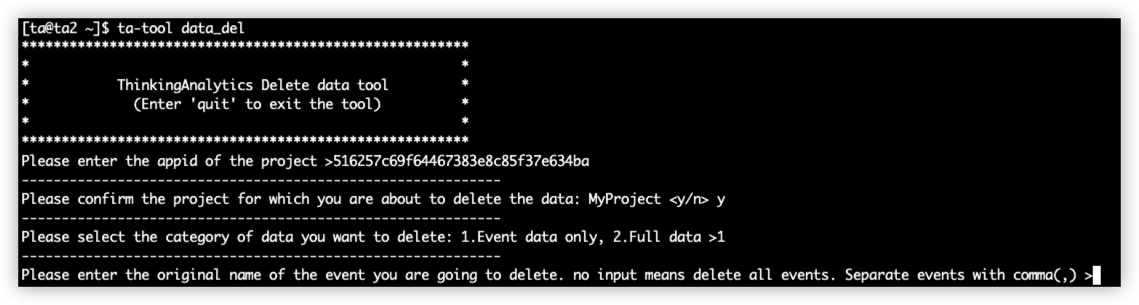
# 2.3 Select data deletion type
Next, you need to select the data to be deleted. You can delete only the event data (that is, the data in the event table), or full data (all event table data and all user info table data). The following table shows available operations for two deletion methods:
| Delete data type | Event data only | Full data |
|---|---|---|
| Whether to delete the event table | √ | √ |
| Whether to delete the user info table | √ | |
| Can I choose a time? | √ | All time |
| Can I select an event? | √ | All events |
# 2.4 Operation under the condition of deleting event data
Next, you need to enter the event name of the event to be deleted. The event name entered here is the key value when transmitting data, not the display name. You can query the event name on the metadata management page, and split multiple events to be deleted by ",". After entering, you will be prompted with the name of the event to be deleted.
If you do not enter any characters and then directly press Enter, all event data will be deleted:
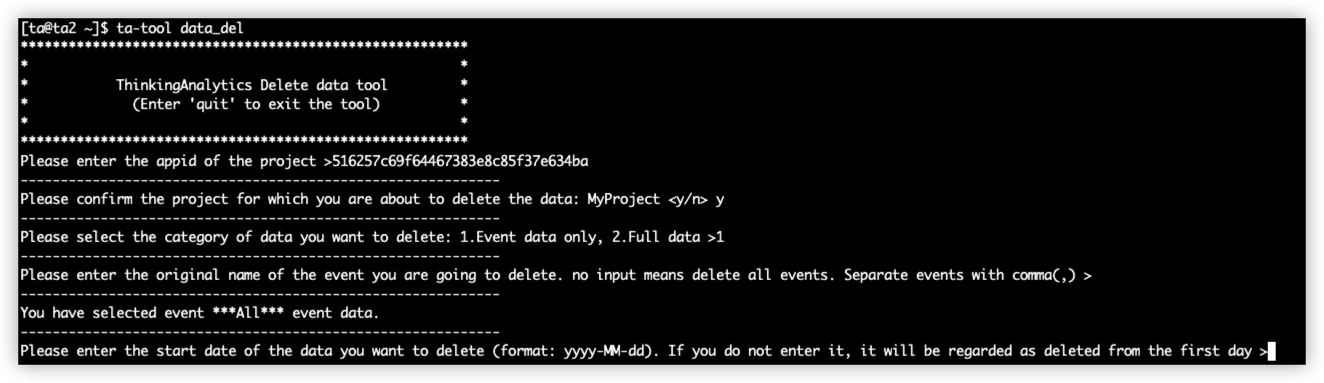
# 2.5 Fill in the time range for deleting event data
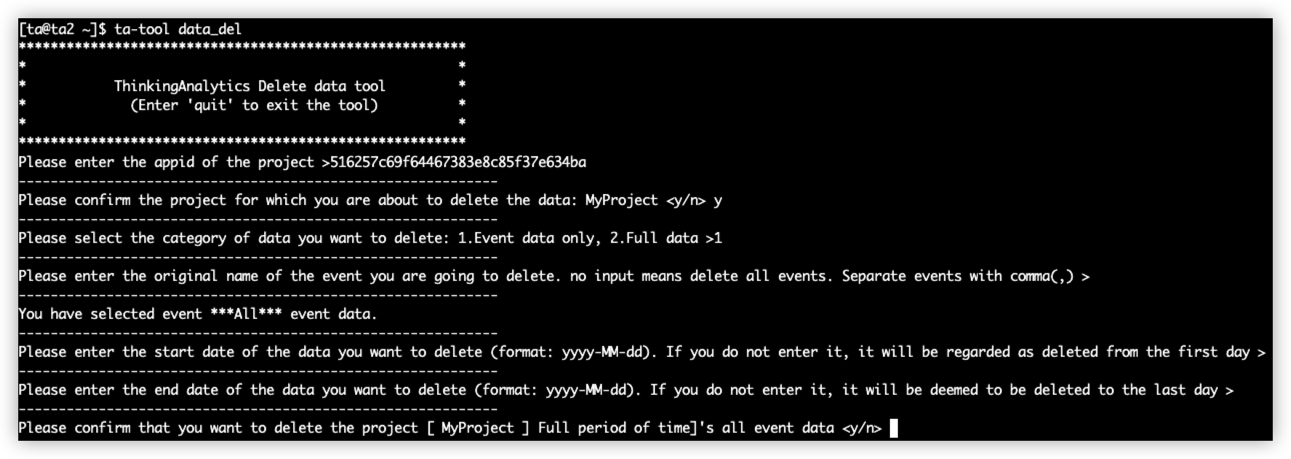
Next, you need to enter the time period for deleting data. The optional time granularity is "days". Please enter the date in the yyyy-MM-dd format. If you do not enter the data and directly press Enter, it will be regarded as the first day/last day of selecting the existing data. The specific operations are as follows (left blank):
| Delete data type | Start date | End date |
|---|---|---|
| Delete data for all time periods | ||
| Delete data from the first day to a specific day | Enter date | |
| Delete data from a specific date to later | Enter date | |
| Delete data for a specific period of time | Enter date | Enter date |
Here is an example of deleting data for all time periods:
# 2.6 Use of custom conditions
If you specify the start date and end date of deletion, an input box for custom conditions will appear. You can use SQL statements to further refine the judgment conditions for deletion of data. The entered custom conditions will be used as the WHERE condition of the deletion statement.
The syntax for custom conditions follows the presto standard. The SQL preview of the delete statement and the amount of data that meets the conditions are provided before deletion. It is recommended that you use SQL IDE to query the data that needs to be deleted before copying the conditions in the WHERE clause to the custom conditions here.
WARNING
Custom conditions do not support sub-query statement.
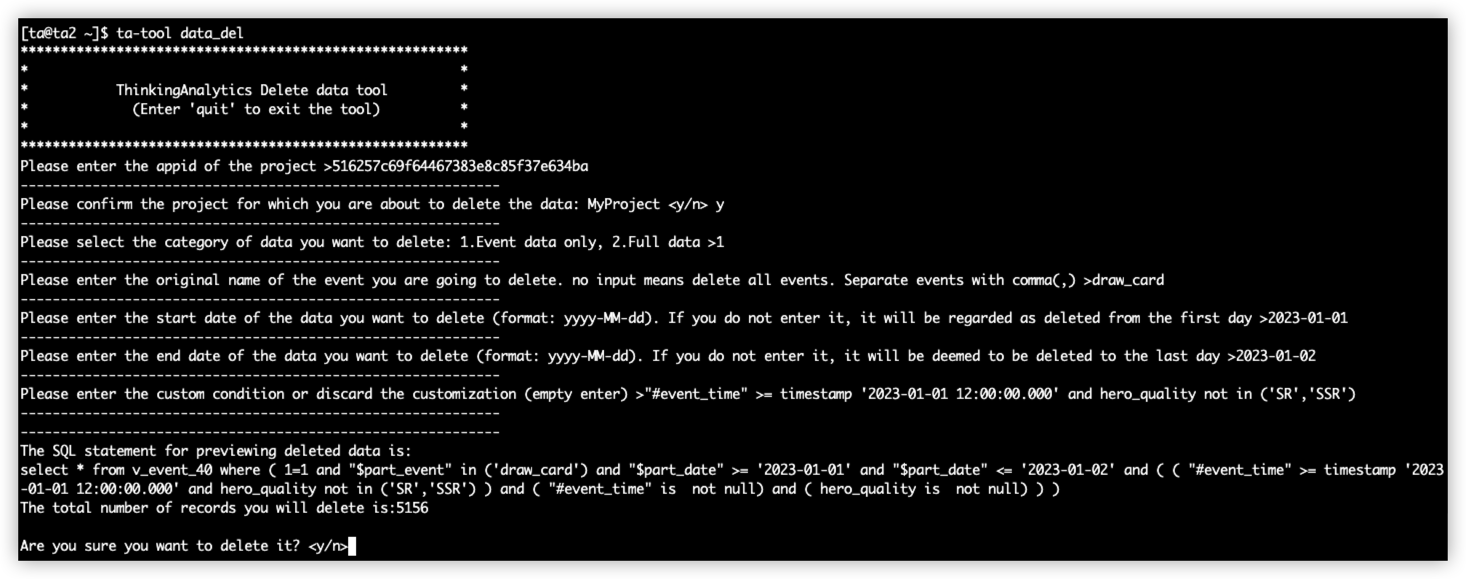
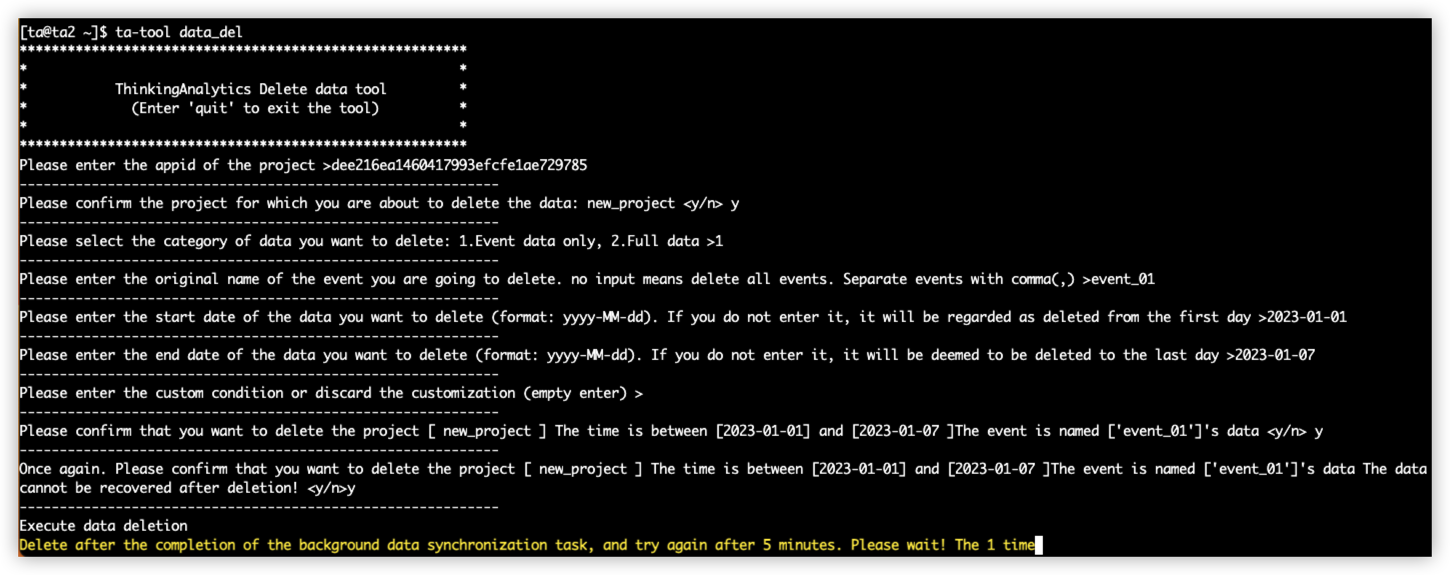
# 2.7 Final confirmation
Finally, before deleting the item, the final confirmation will be made, including the name of the deleted item, the name of the deleted event and the time period for deletion. Enter 'y' to start deleting data. If there is an error, you can enter 'n' to exit the tool and re-enter:
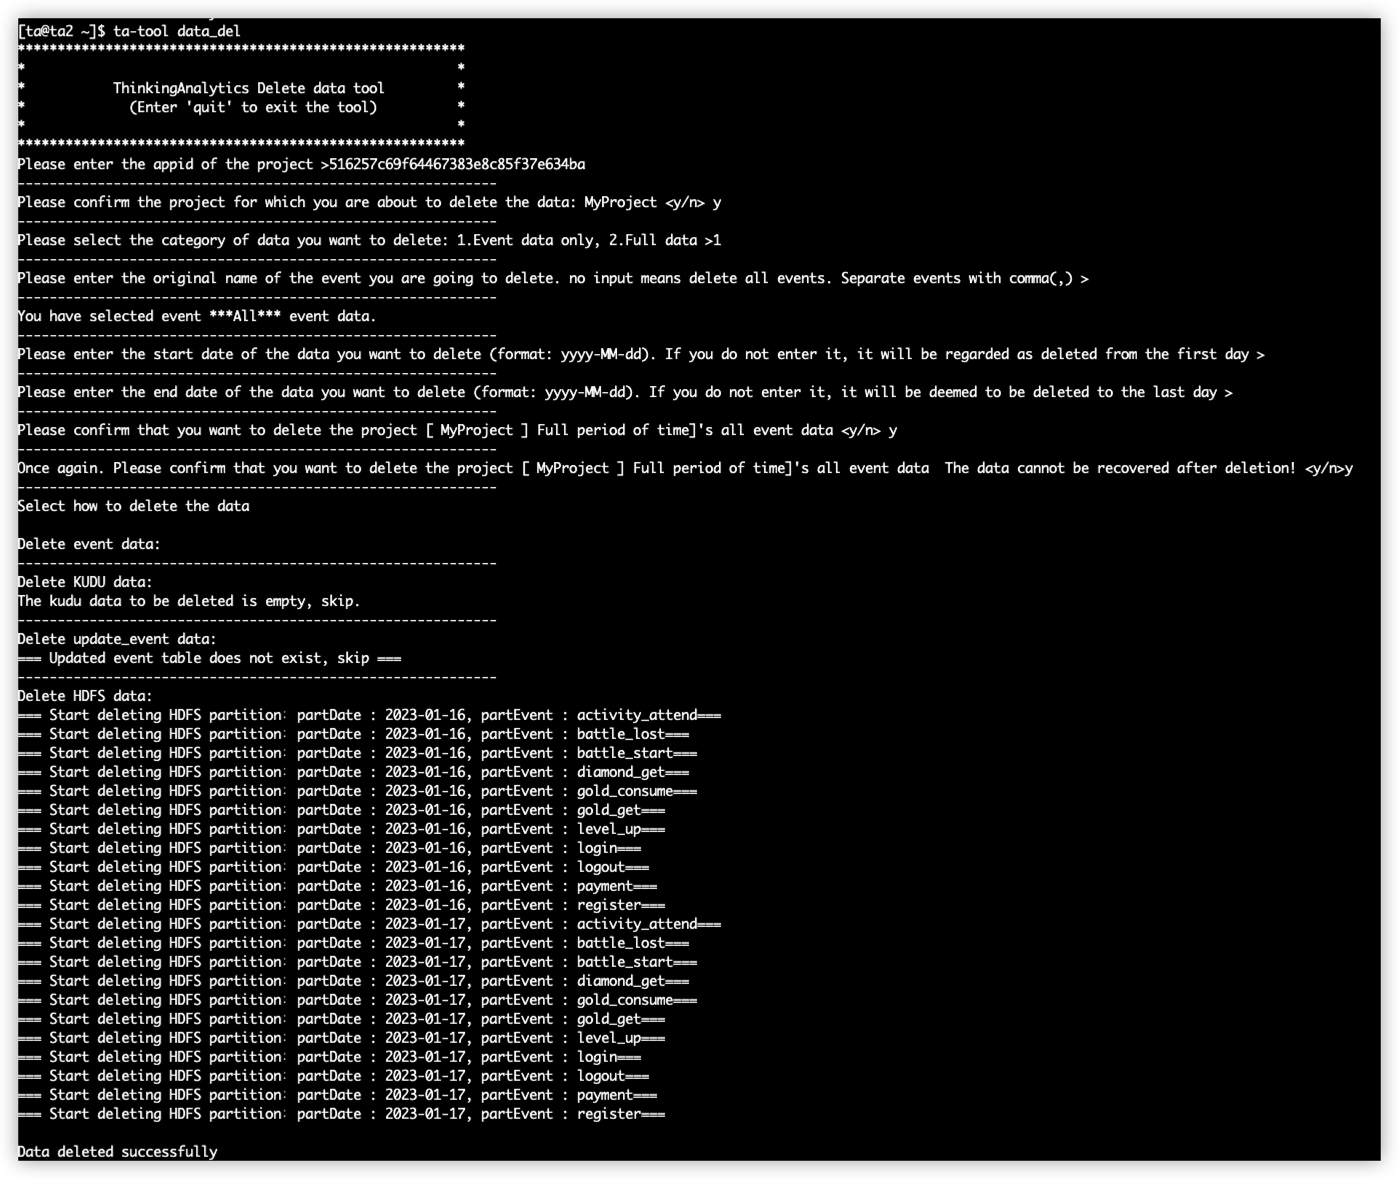
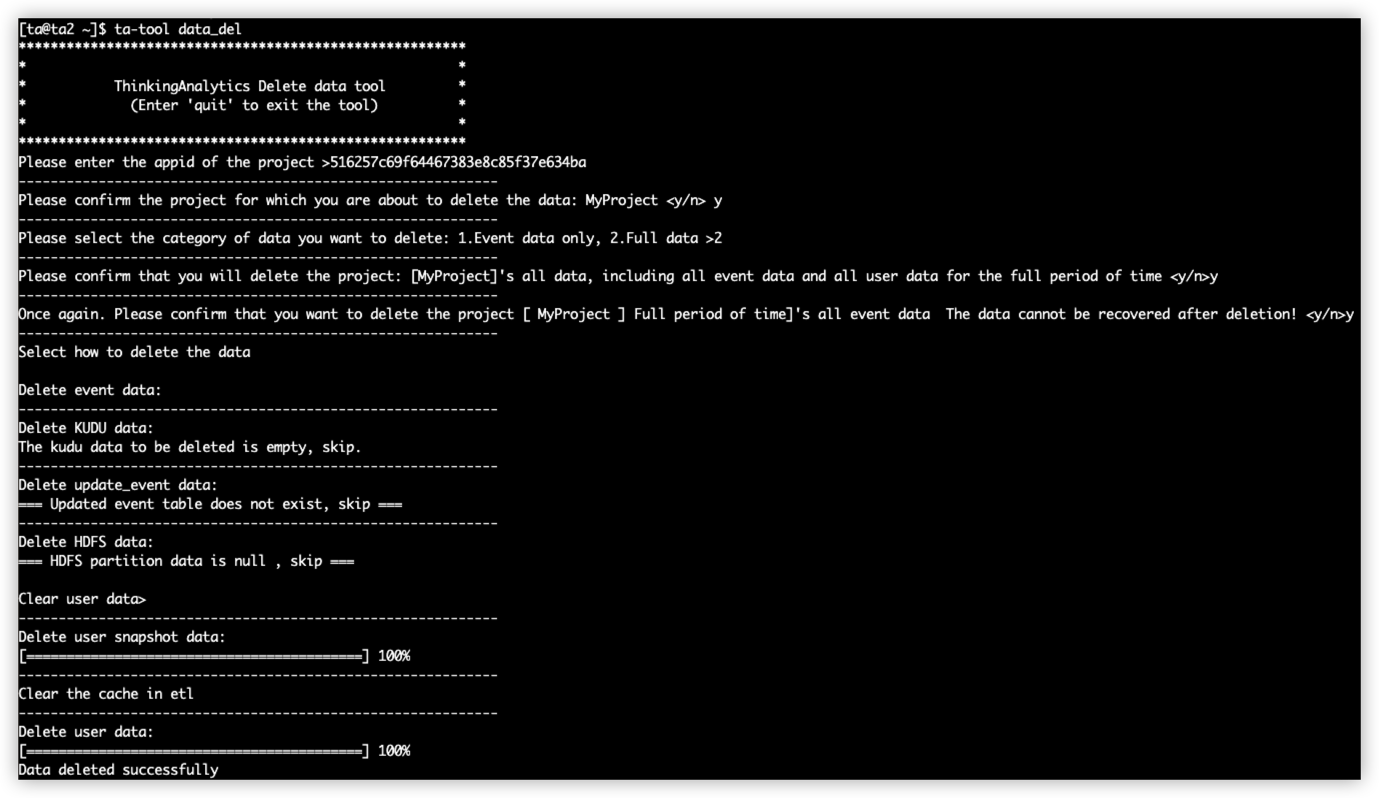
# 2.8 Operation in the case of deleting full data
If you choose to delete full data, you should directly confirm before deletion, enter 'y' to start deleting the data. If there is an error, you can enter 'n' to exit the tool and re-enter:
# III. Precautions
# 3.1 The data deletion tool only clears the data in the table and does not clear the following data:
- Project member data
- Project information data (project ID and APPID)
- Volume of events used
- Events, event properties, and user property metadata
- Display name, comments and hidden status configured in metadata management, dashboard and report information, etc.
If you need to clear the above data, it is recommended to directly build a new project.
# 3.2 Make sure that no new data is passed in during the data deletion period
Before using the data deletion tool, make sure that no new data is passed in during the deletion period (e.g. when you delete yesterday's data, you should not pass in yesterday's data during the deletion period) to ensure the effect of data clearing. If data for the deletion time period is passed in during data deletion, it may result in incomplete data deletion.
# 3.3 A prompt appears when performing a data deletion action:
After the background data synchronization task is over, perform deletion and try again in 5 minutes, please wait! First time
You can wait for the program to execute automatically, or wait for some time and try to delete again.